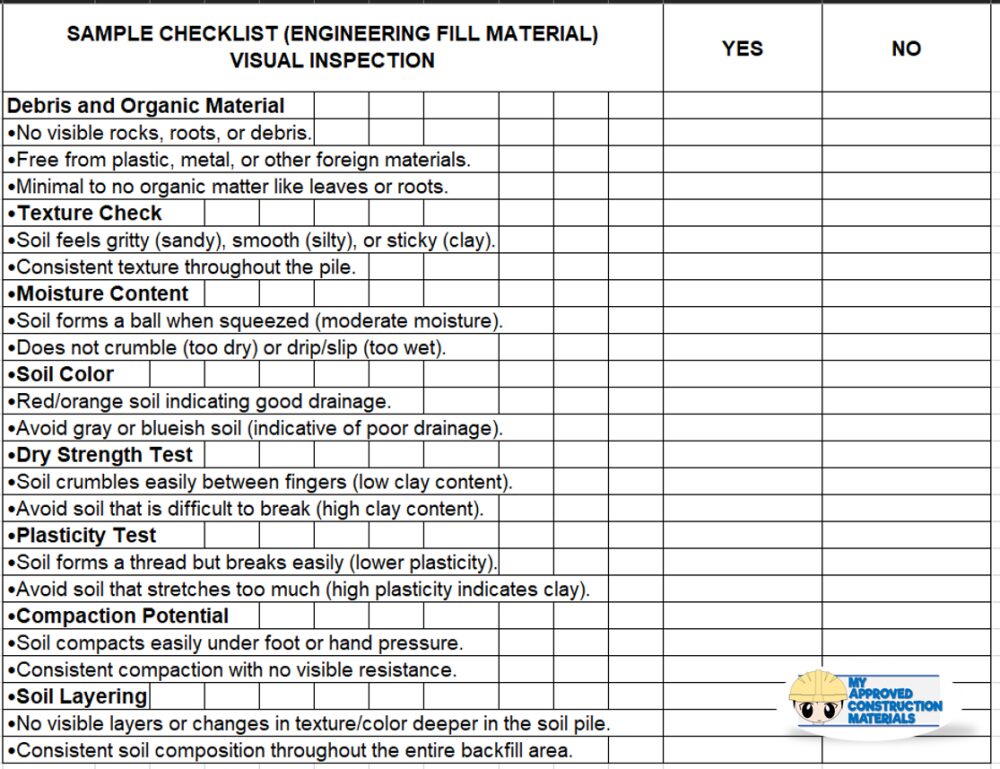
Backfilling is a crucial step in ensuring the stability and longevity of building foundations. But how can you quickly assess if the soil you’re using is up to the task? While lab tests provide precise data, a visual inspection can be a fast and effective way to gauge the suitability of the soil on-site. Here’s a detailed guide on how to check soil as backfilling material using basic visual techniques.

1. Look for Debris and Organic Material
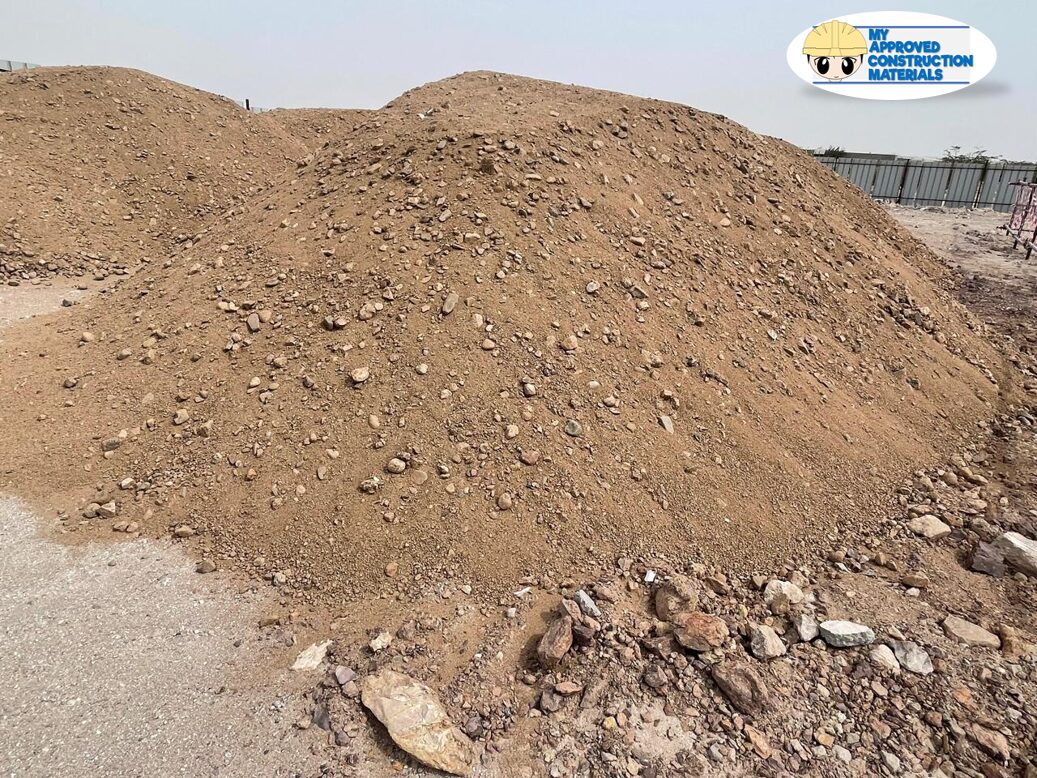
Before you dive into the inspection, clear the soil of any debris like rocks, roots, plastic, or metal. Organic materials such as leaves or plant roots can decompose over time, causing voids in the soil.
Why it matters: Debris and organic material can lead to uneven settlement of the soil, which can destabilize the foundation over time. Clean soil helps ensure long-term stability.
2. Feel the Soil’s Texture
Pick up a handful of soil and rub it between your fingers. Is it gritty like sand, sticky like clay, or soft like silt? Sandy soils feel coarse, clay is sticky when wet and hard when dry, and silt feels smooth and fine.
Why it matters: The texture determines how the soil behaves under pressure. Sandy soils are great for compaction and drainage, while clay retains moisture, which can cause it to expand or contract—bad news for foundations.

3. Check Moisture Levels
Grab a clump of soil and squeeze it in your hand. If it forms a ball that holds its shape, it’s got a lot of moisture. If it crumbles, it’s dry. If it’s dripping water or feels slimy, it’s too wet.
Why it matters: Proper moisture content is key for compaction. Too much moisture can prevent soil from compacting properly, leading to future settlement issues. Aim for a soil that’s neither too wet nor too dry for optimal results.
4. Inspect Soil Color
Soil color can reveal a lot about its drainage capabilities. Red or orange soils often indicate good drainage because of iron content, while dark or black soils usually mean high organic content. Gray or blueish soil often points to poor drainage or high water content.
Why it matters: Poorly draining soil can lead to water retention around the foundation, increasing the risk of erosion and foundation damage over time. Look for lighter, well-draining soils when selecting backfill material.
5. Perform the Dry Strength Test
Take a small, dry piece of soil and try to crush it between your fingers. If it crumbles easily, it’s likely sandy or low in clay. If it resists breaking, it’s clay-heavy.
Why it matters: Clay soils tend to shrink and crack when they dry, leading to foundation problems. Soils with less dry strength, such as sandy soils, are generally better for backfilling.
6. Try the Plasticity Test
Roll a small piece of moist soil into a thin thread between your hands. If it forms a thread easily without breaking, the soil has high clay content. If it falls apart quickly, it’s more likely sand or silt.
Why it matters: Clay-rich soils can swell and shrink with moisture changes, which might cause damage to foundations. Soils with lower plasticity are more stable and better for backfilling.
7. Conduct a Quick Compaction Test
After assessing the soil’s basic properties, try compacting a small pile of it by pressing down with your foot or hand. Does it compact easily or resist? Sandy soils compact well, while clay might resist compaction.
Why it matters: Proper compaction is vital to avoid future soil settlement. If the soil doesn’t compact well in this simple test, it might not be ideal for backfilling.
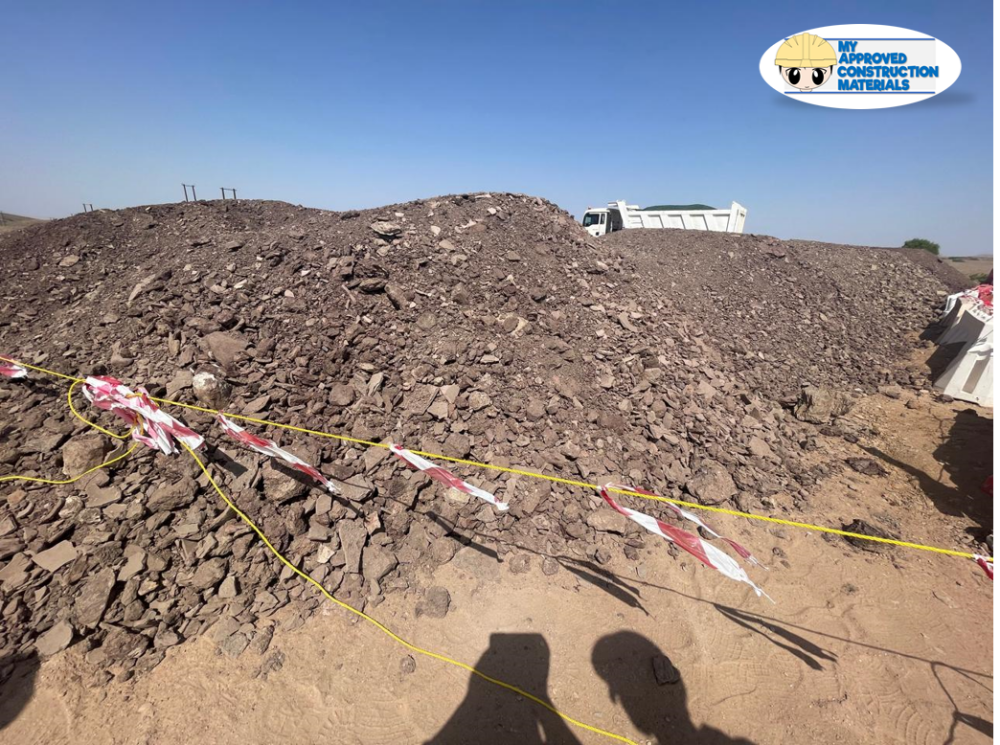
8. Look for Soil Layering
Dig into the soil pile and see if the soil changes texture or color as you go deeper. Inconsistent soil quality or layers of different materials could indicate potential issues down the line.
Why it matters: Consistent soil is key to even compaction and stability. If the soil is layered with different materials, it could lead to uneven settlement and foundation issues later.
Conclusion
Visual soil inspection is a quick and effective way to assess whether your backfilling material is up to standard. By checking for debris, texture, moisture content, and other key indicators, you can catch potential issues before they become major problems. While laboratory testing is the most reliable method, these easy steps can help you make an informed decision on-site.
Bibliography
- Bowles, J.E. (1997) Foundation Analysis and Design. 5th edn. New York: McGraw-Hill.
- Coduto, D.P. (2001) Foundation Design: Principles and Practices. 2nd edn. Upper Saddle River: Prentice Hall.
- Das, B.M. (2015) Principles of Foundation Engineering. 8th edn. Boston: Cengage Learning.
- Holtz, R.D., Kovacs, W.D. and Sheahan, T.C. (2011) An Introduction to Geotechnical Engineering. 2nd edn. New Jersey: Pearson Education.
- Sowers, G.F. and Sowers, G.B. (1993) Introductory Soil Mechanics and Foundations: Geotechnical Engineering. 4th edn. New York: Macmillan.
- Raj, P.P. (2008) Soil Mechanics & Foundation Engineering. Pearson Education.
Check also my post about Mortar for Masonry.
This guide offers valuable insights into visual soil inspection for backfilling materials. I appreciate how you break down the various techniques, such as checking for debris and assessing moisture levels. It’s interesting to learn how texture can impact soil behavior under pressure. In your experience, what are some common pitfalls people encounter when performing these visual inspections? I’m curious if there are specific indicators that tend to be overlooked, which could lead to foundation issues later on. Thank you for sharing such informative content!
Hi Hanna,
Thank you for your thoughtful comment! I’m glad you found the guide helpful. While visual inspections are a quick and easy way to assess soil on-site, it’s important to remember that they are only preliminary checks. Engineers never rely solely on visual inspections, as there are more precise tests (like Proctor compaction tests, soil gradation, and Atterberg limits) that need to be conducted to fully assess the soil’s suitability for backfilling.
As for common pitfalls during visual inspections, one mistake is underestimating moisture content. Soil that’s too wet or too dry can lead to compaction issues later. Another is overlooking the presence of fine particles like clay, which can cause unexpected soil expansion or shrinkage. While these visual techniques are useful, they should always be followed up with proper lab tests to ensure long-term foundation stability. Thanks again for your interest!
Fascinating. Love your ‘why it matters’ pattern. You are a soil expert clearly. Do you conduct all these tests before you buy/acquire soil? I’m a gardener and veg grower, so soil matters to me, but I want as much organic matter as possible, so it’s the opposite of your requirements.
I’m curious. Do you buy the soil you use for construction work, or are there sources from which you can dig it for free? I guess you’re in the States, so as I’m in Japan, I’d love to know. There are places where I can go and dig excellent soil for nothing here !
This is a super helpful guide for anyone involved in construction or DIY projects! I love how practical and hands-on these visual inspection tips are, especially since not everyone has access to lab testing on-site. The idea of checking soil texture and moisture with simple touch and squeeze tests is brilliant. It’s something anyone can do quickly. I also appreciate the emphasis on avoiding organic material and debris, which is often overlooked but can have long-term impacts on the stability of the foundation. Overall, this is a great reminder that even small, on-the-spot checks can make a big difference in ensuring the success of a project!
Your guide on visually inspecting soil for backfilling materials is comprehensive and detailed. Ensuring the suitability of soil is crucial for the stability and longevity of any construction project.
It is essential to recognize that soil composition varies significantly depending on geographical location, which impacts its load-bearing capacity. For instance, clayey soils, known for their high plasticity, can cause significant structural issues if not properly assessed and managed. Additionally, identifying organic content is vital, as decomposing organic matter can lead to settlement problems over time.
Maybe utilizing simple tests, such as the ribbon test for texture or observing color changes for oxidation states, can provide valuable insights into soil quality. I think that Implementing these visual inspection techniques not only ensures compliance with engineering standards but also mitigates potential risks associated with improper backfilling. Do you think there are other advanced visual techniques or tools that could further enhance the accuracy of soil assessment for construction projects?
Hi Fais,
I recently had the pleasure of reading your article, “How To Check Soil For Backfilling Materials By Visual Inspection: The Ultimate Guide,” and I must commend you on the comprehensive and practical approach you’ve presented. Your detailed breakdown of the various techniques for assessing soil by visual means is not only enlightening but also immediately applicable to professionals in the field.
Your introduction to the importance of removing debris and organic materials sets a solid foundation for understanding the critical nature of this initial step. It’s a vital reminder that the long-term stability of a foundation begins with the quality of the backfill material used.
I particularly appreciated your explanations on how different soil textures affect the behaviour of soil under pressure. Your practical insights into the characteristics of sandy, clay, and silt soils provide a clear guideline for quickly identifying the most suitable type of soil for backfilling, depending on its texture and moisture content. The tips on assessing moisture content and the impact of soil colour on drainage capabilities were especially helpful. These pointers not only serve as a quick-check guide but also highlight the potential long-term implications of choosing poorly suited soil.
The section on soil compaction and the ability of soil to maintain consistency in texture and colour at varying depths further underscores the importance of thorough on-site soil evaluation. Your article adeptly bridges the gap between rapid visual assessment and the detailed analysis typically reserved for laboratory testing.
Moreover, your references to foundational texts by Bowles, Coduto, Das, Holtz, Kovacs, Sheahan, and the Sowers provide a robust academic backbone to your practical guide, enhancing the credibility and depth of the information provided.
In sharing your expertise, you’ve created a valuable resource for construction professionals and engineers alike. I look forward to integrating these techniques into our practices and potentially discussing further collaborative opportunities where your expert insights could be showcased to our audience.
Thank you for sharing your knowledge and contributing to better building practices. Your work is a testament to the importance of marrying practical field skills with academic knowledge.
All the Best,
Eric